 I love making dumplings almost as much as I love eating them. Luckily, W loves them too - we relish what we call our dumpling dinners at least once a fortnight, be they toasty pan-fried pot-stickers like gyōza or guo tie, or soup dumplings, or wontons floating in clear broth. And after finally figuring out how to rustle up a few basic dumpling wrapper doughs, the process has become one that affords as much therapy as it does good eating.
I'd been meaning to get round to posting about the simple hot water dough that's used for potstickers, but never quite got my act together enough to take a few making-of snaps, which are probably more functional than any length of explanatory column inches - it's definitely one of those things that sounds trickier in writing than the doing actually is. Store-bought wrappers, it goes without saying, can be used for the gyōza stuffing below, making for an extremely quick yet tasty supper to throw together. But being manufactured from a cold water dough, they will not have that distinct taste and texture - a toothsome resilience and subtly glutinous quality - characterictic and beloved of tang mian (hot water dough). Also, once accustomed to how seductively supple and pliant to the touch this well-behaved dough is, how it's soft and moist enough to seal unto itself without need for a wet finger run round the rim, how the finished dumpling is as seamless as a fine Hanro chemise, it'll be hard to go back to off-the-shelf.
The recipe below makes 32 dumplings, which generously feeds four. Or you could cook some for two, and freeze the rest (uncooked) for later.
 The Gyōza Stuffing:
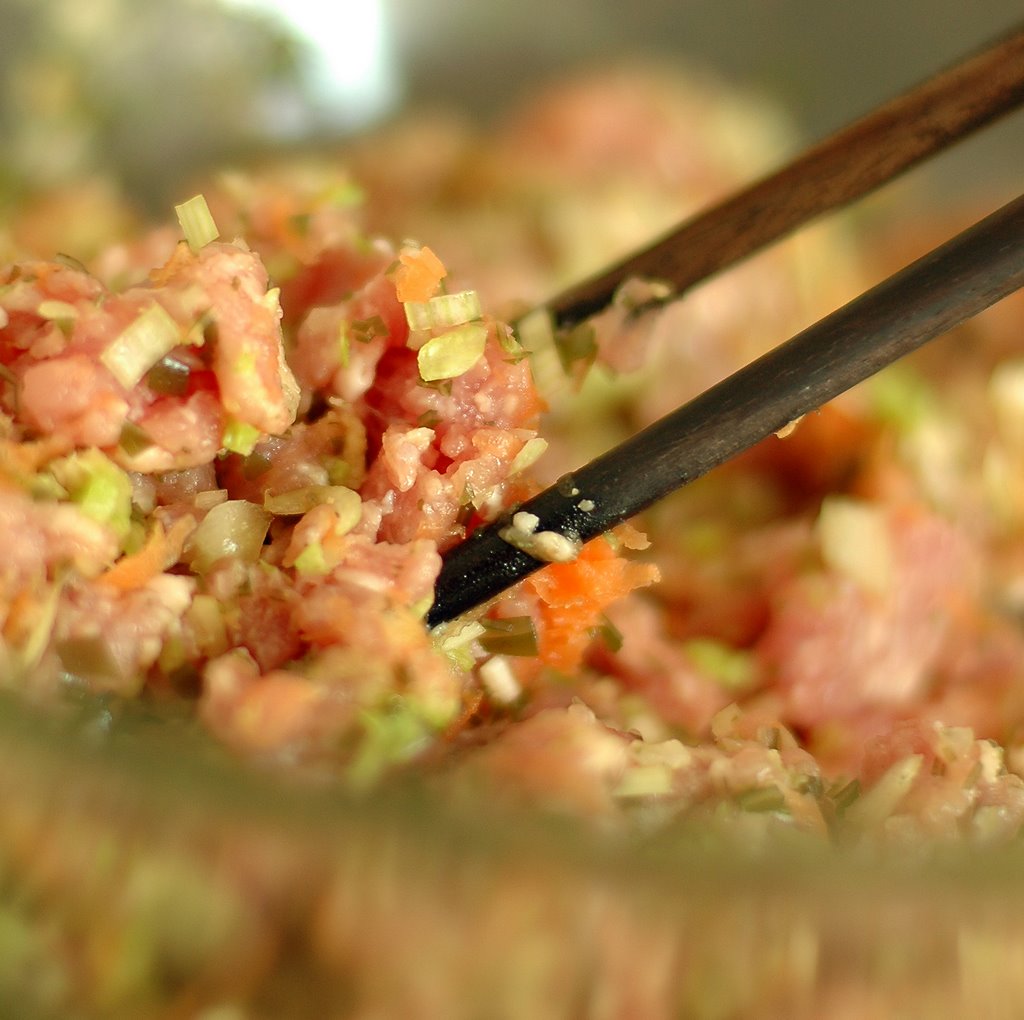
Inspired by a recipe in Elizabeth Andoh's wonderful book, Washoku. Many variations for this pork and cabbage stuffing abound - I particularly like this one for its inclusion of leek, carrot and wakamé, which really heighten the natural sweetness of the pork.
2 Tbsp dried bits of wakamé
2 napa cabbage leaves, minced
¼ Tsp salt
3 inch piece white part of leek, preferably Japanese naganegi, minced
2 Tbsp grated carrot
300 gm ground pork, kurobuta if available
2 Tbsp saké
1 Tbsp shiro (white) miso, preferably Saikyō
1 Tbsp sesame oil
1 Tbsp ginger juice, squeezed from grated ginger (see below)
Freshly ground black pepper, to taste
1 Tbsp cornstarch
1 Tsp sugar
4 Tbsp chicken stock, preferably homemade
1 Tsp soy sauce
1. Soak the wakamé in water till softened. Drain, pat dry, mince, and set aside in a large mixing bowl. Toss the cabbage with salt. Let sit for 10 minutes to draw out moisture. Drain, squeeze dry, and add cabbage to the bowl. Add leek and carrot to bowl. Stir to combine. Add ground pork. Stir to combine.
2. In a small bowl, combine all the other ingredients. Add this seasoning liquid to the pork mixture gradually, stirring all the while to ensure the stuffing is evenly mixed. You will end up with a fairly loose, moist mass. Press clingwrap directly to the surface of the mixture. For the best flavour, let sit at room temperature for 30 minutes, or store immediately in the fridge (it can keep overnight), before using.
 I find the saucer-shaped Japanese ceramic grater with a raised central platform of spikes (thus ingeniously creating a moat for collecting the juices of whatever you're grating) the most efficient implement for dealing with ginger, be it juice or grated ginger (the spikes also help catch tough fibres) that's needed for a recipe - I couldn't live without my Kyocera grater, which also has a thoughtful non-slip rubberized rim on the bottom.
 The Gyōza Wrapper Dough:
I first came across tang mian in Fuchsia Dunlop's Sichuan Cookery (which incidentally has a collection of fantastic Sichuanese dumpling recipes - steamed, boiled, pan-fried, you name it - if you're interested), and liked it so much I have used this hot water dough for potsticker-style dumplings ever since. There's a similar recipe to be found in Hiroko Shimbo's The Japanese Kitchen.
250 gm plain flour
¼ Tsp salt
150 ml water
1. Combine the flour and salt in a large mixing bowl. Make a well in the centre. Bring water to the boil. Remove from heat. Once it stops bubbling, immediately pour onto the flour. Mix vigorously and quickly with a large fork. When the mixture is cool enough to handle (but still warm), transfer it to your work surface and knead for 5 to 10 minutes to a perfectly smooth dough. The dough should feel soft and pliant, but not tacky. When lightly pressed with your finger, the dough will bounce gently back.
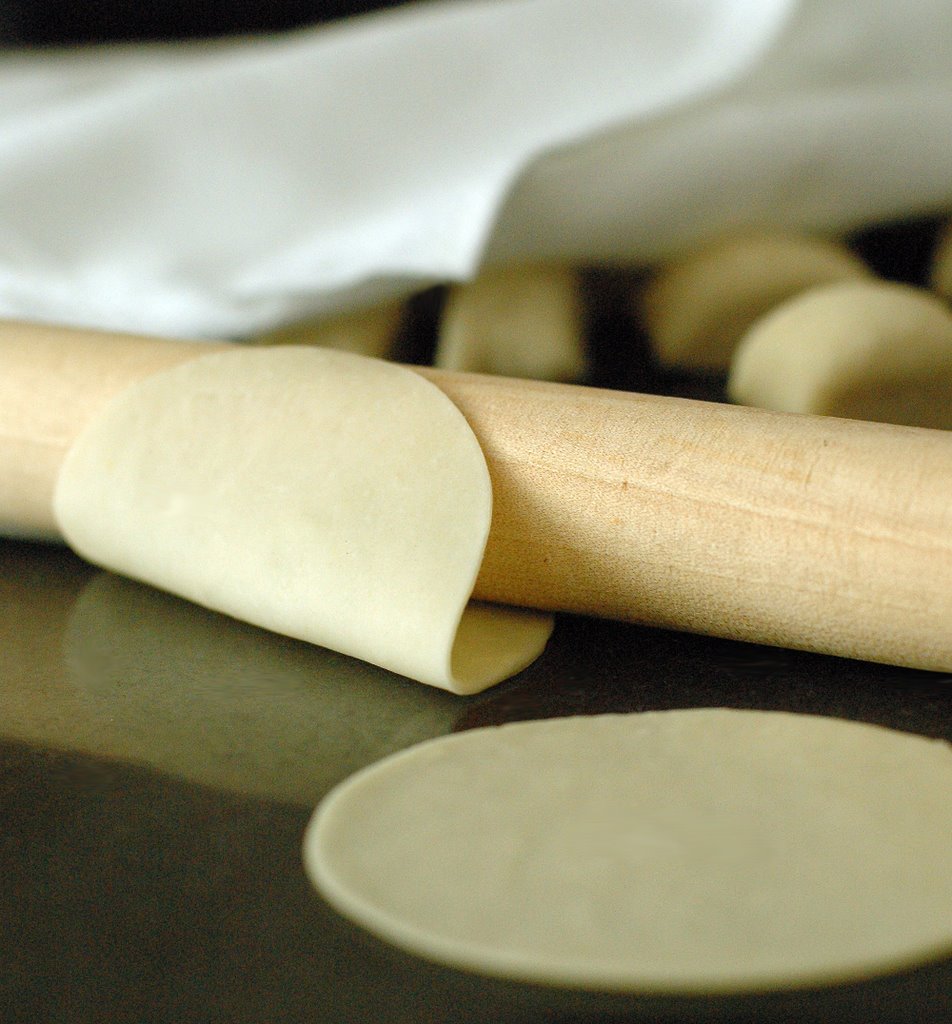
2. Very lightly flour the work surface if necessary - dough of the correct consistency needs little or no additional flour; only flour the surface if the dough is sticking. Divide dough into four pieces. Roll each piece out into a sausage-like rope. Divide each rope into eight pieces. Each piece (there’re 32 in total) makes one wrapper. Whilst proceeding, cover the pieces you aren’t working on with a clean, wet-then-wrung dish towel to prevent the dough from drying out.
Shaping the Gyōza:
Verticalization of the production process (roll out all the pieces, stamp out all the circles for wrappers, fill all the circles, shape all the dumplings) may seem like a good idea - and probably is, if you’re very speedy or there's more than one pair of hands in the kitchen –until you have the dough drying out on you before you’re done filling and shaping. So it’s probably a more prudent idea to break it up (roll, stamp, fill and shape the first group of wrappers before you roll out another group of dough pieces – about four to eight pieces at a go is manageable, depending once again on your speed). If using store-bought wrappers, simply skip straight to step 2. and proceed with filling and shaping, but you'll need to slightly moisten the edges of the wrappers with water to seal the dumplings.
1. Line a baking sheet with non-stick parchment to hold the finished dumplings. Set aside, within arm's reach of your work surface. Flatten each of the dough pieces with the palm of your hand. Roll the flattened pieces into circles slightly larger than 6 cm in diameter. Use a 6 cm round cutter to stamp out wrappers. Discard the ragged trimmings.
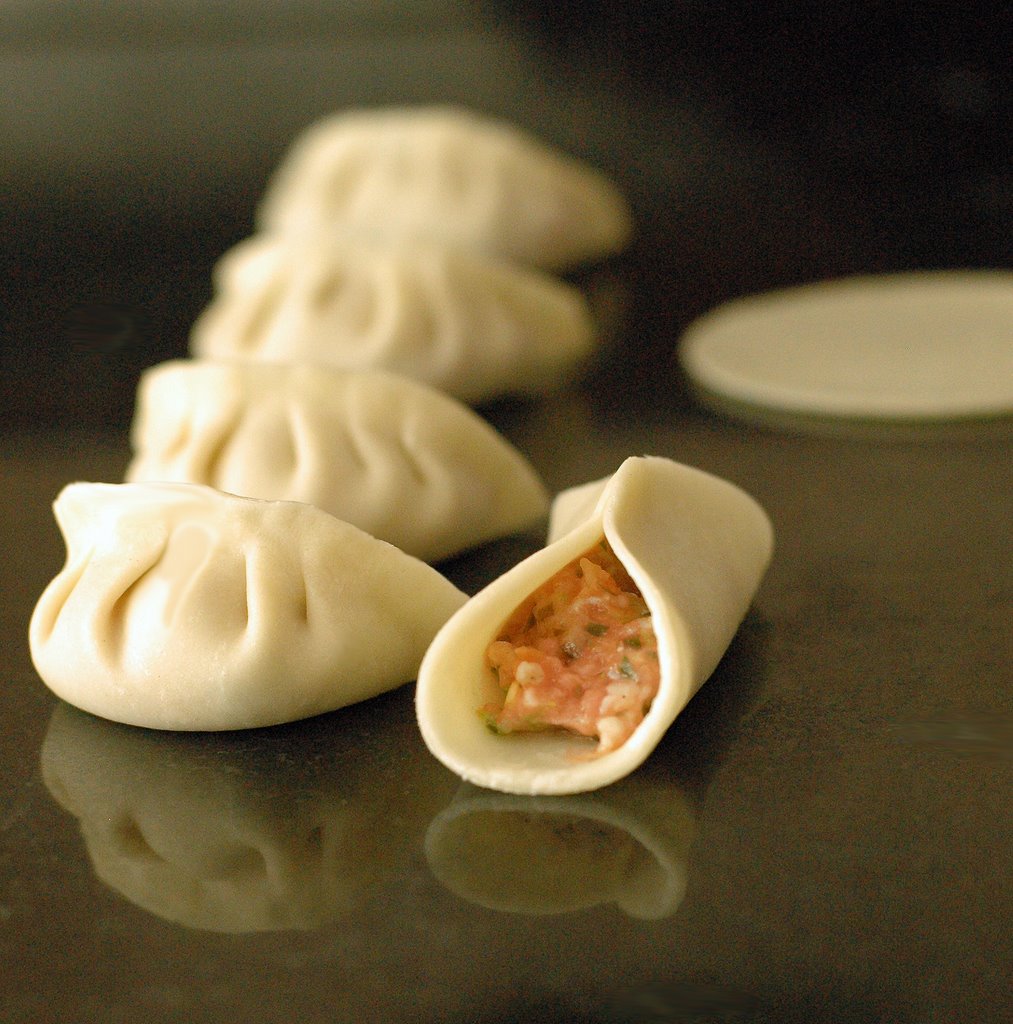
 2. Fill one wrapper at a time, keeping the remaining covered. Place a heaped teaspoon of stuffing into the centre of the dumpling wrapper, nudging it into a quenelle-like shape that's tapered towards the two ends of its length (this makes the dumpling easier to seal), ensuring there's a clear border of wrapper circumnavigating the stuffing. Fold the wrapper gently in half by bringing the two sides (parallel to the length of the stuffing) up over the stuffing. Pinch shut at midpoint before pleating and pressing - homemade wrappers are soft and moist so you'll have no problem sealing them.

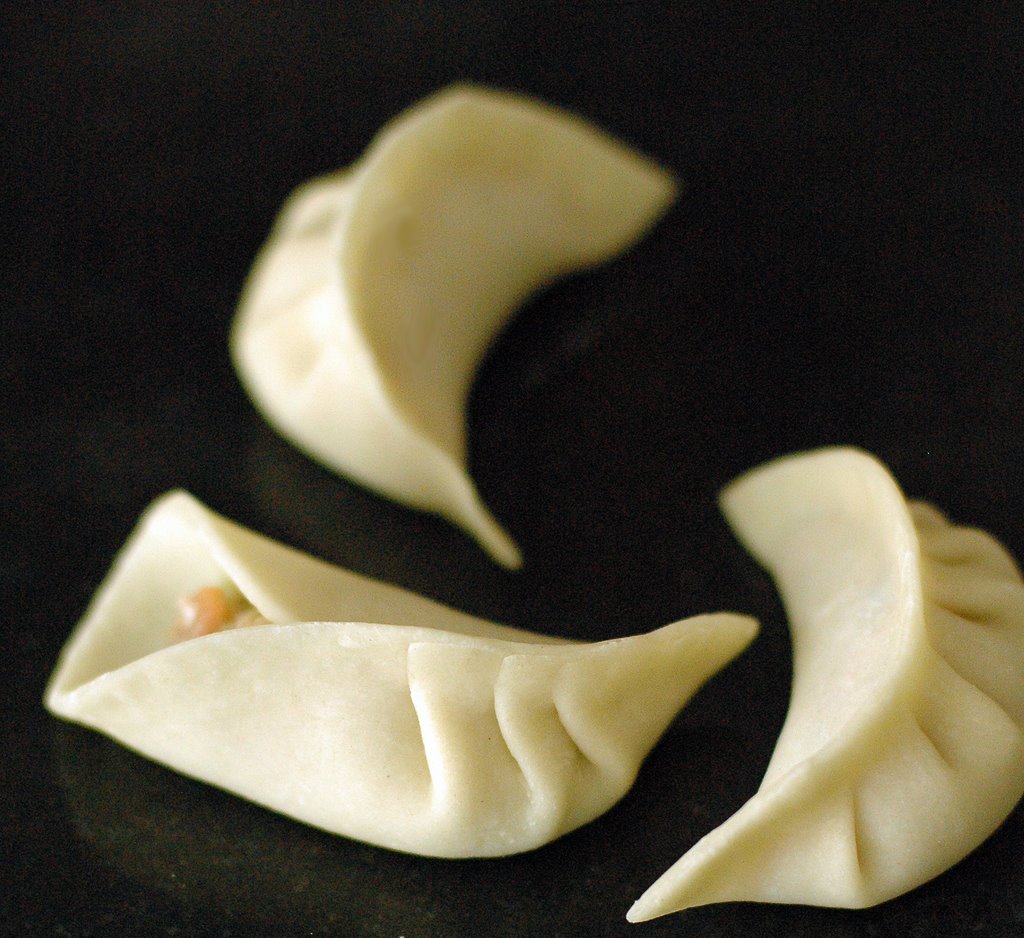
3. Starting to the right of the midpoint, make three tidy and tiny pleats on the side of the wrapper facing you (and not on the further side), folding the pleats in the direction towards the midpoint. After each pleat, pinch the dough to join the pleat to the unpleated side of the wrapper. Pinch the extreme right corner of the arc closed. Half the dumpling has been sealed.
4. Repeat the process to the left of the midpoint. Starting to the left of the midpoint, fold the pleats in the opposite direction from before (in other words, still folding the pleats in the direction towards the midpoint). Pinch the extreme left corner closed.
5. Now gently pinch all along the elegant arc that you've created to ensure it is securely sealed, and to thin the ridge of dough. The dumpling is now completely sealed. The finished dumpling, as seen from an aerial view, is pleated on one side, smooth on the other, naturally curved into a pot-bellied crescent shape thanks to the pleating method, and sits on a flat base. The beauty of this method, aside from the beauty of the dumpling, is that the dough is not coarsely thick at the ridge, having been pleated only on one side, and the dumpling stands upright on the tray and later, in the skillet.
6. Set the first batch of dumplings aside on the lined tray; the dumplings should not touch each other. Repeat above steps with subsequent batches of dough pieces until done.
Note: If not cooking the dumplings immediately, freeze them (they freeze very well) in one layer on the tray covered with clingwrap. When frozen, pack the dumplings into airtight storage boxes. They will keep, frozen, for a fortnight. When cooking frozen dumplings, do not thaw them – cook from frozen, adding an extra minute or two to the steaming time.
Cooking the Gyōza:
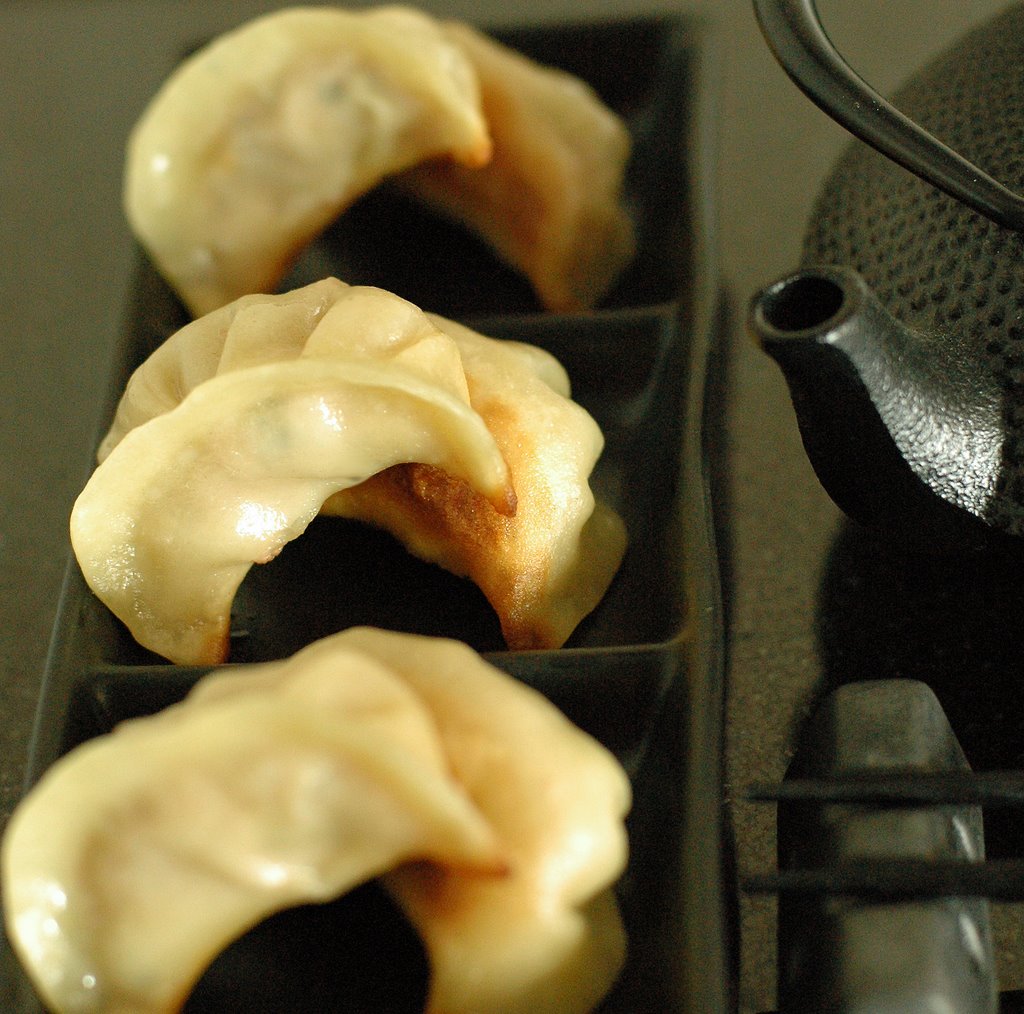
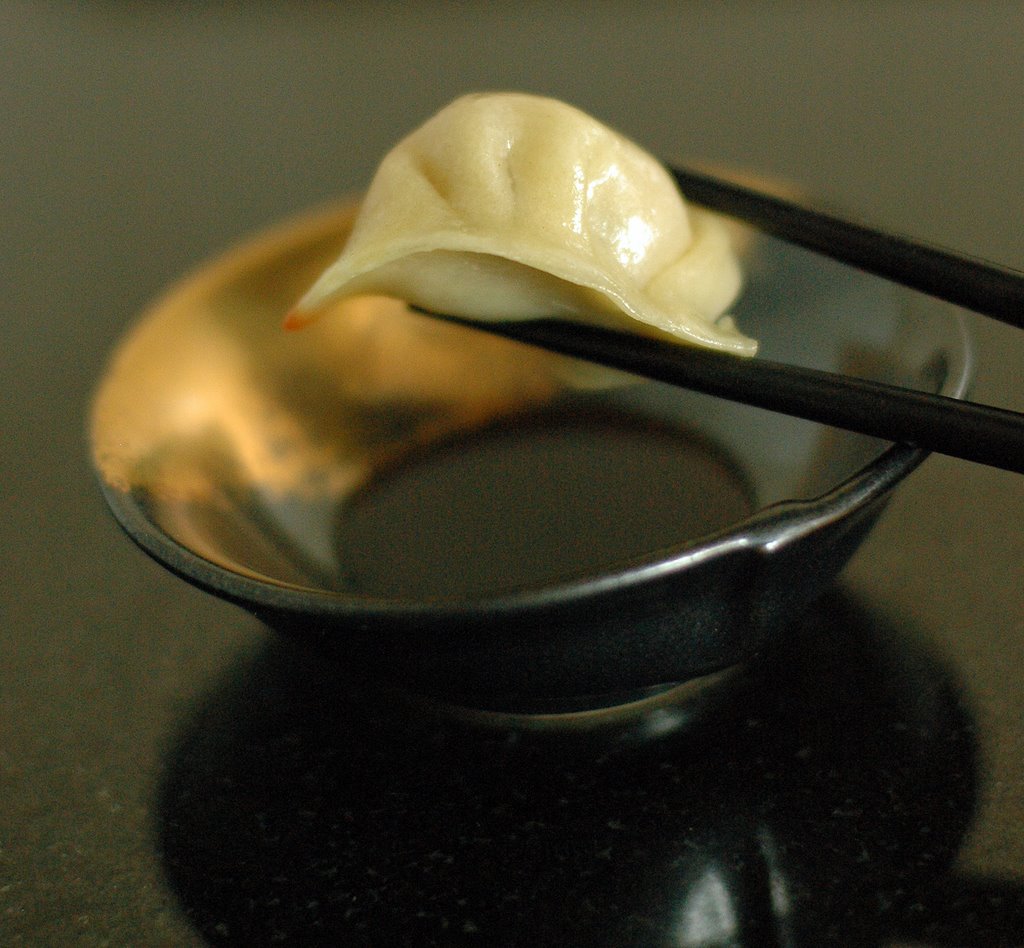
The potstickers are cooked by a method which part-fries, part-steams them, so they wind up juicy and succulent yet have crisp, golden bottoms - in Japanese, this type of cooking is called mushi yaki ("steam searing").
Typically, the potstickers are drizzled with water to create steam. However, I like steam-cooking them with chicken stock instead of water, which gives them extra oomph in terms of both flavour and colour - a marvellous trick I picked up from Barbara Tropp's The Modern Art of Chinese Cooking.
Groundnut oil
150 ml to 250 ml chicken stock, preferably homemade
1 tsp sesame oil
1. Heat a heavy skillet large enough to accommodate all the dumplings at once over a medium-high flame. Add enough groundnut oil to slick the surface amply. When the oil is properly hot, carefully line up the dumplings in the skillet, side by side in neat rows resting on their flat bottoms. Cook the dumplings for 2 to 3 minutes, or until nicely browned on the bottoms, checking the colour by carefully lifting a couple of dumplings by their pleated edge.
2. Pour in enough chicken stock to come one-third of the way up the sides of the dumplings. Be careful; the liquid will hiss, splatter and spit as soon as it hits the pan. Lower the heat to maintain a gentle simmer, and immediately cover the skillet with a lid to trap moisture and create steam. Steam for 4 to 5 minutes (6 to 7 minutes if cooking from frozen). Start checking the progress after 3 minutes; when the wrappers appear translucent, the stock is almost all absorbed, and the meat is cooked (check by prodding with chopsticks for firmness), remove the lid.
3. Drizzle the dumplings with the sesame oil. Raise the heat slightly and continue to cook at a merry simmer until all the liquid has evaporated and only the oil remains, about 2 to 3 minutes. They are done when their bottoms are crisp enough to "clink" when tapped with a fingernail. To serve, remove with a spatula and turn them upside down onto a serving plate so their golden bottoms face up. Serve without delay, accompanied by the dipping sauce (see below).
 Dipping Sauce:
4 Tbsp soy sauce
2 Tbsp rice vinegar, preferably brown rice vinegar
1. Stir the soy and vinegar together.
2. Distribute among individual sauce dishes.
Note: If liked, add some grated ginger and/or chilli oil to taste.
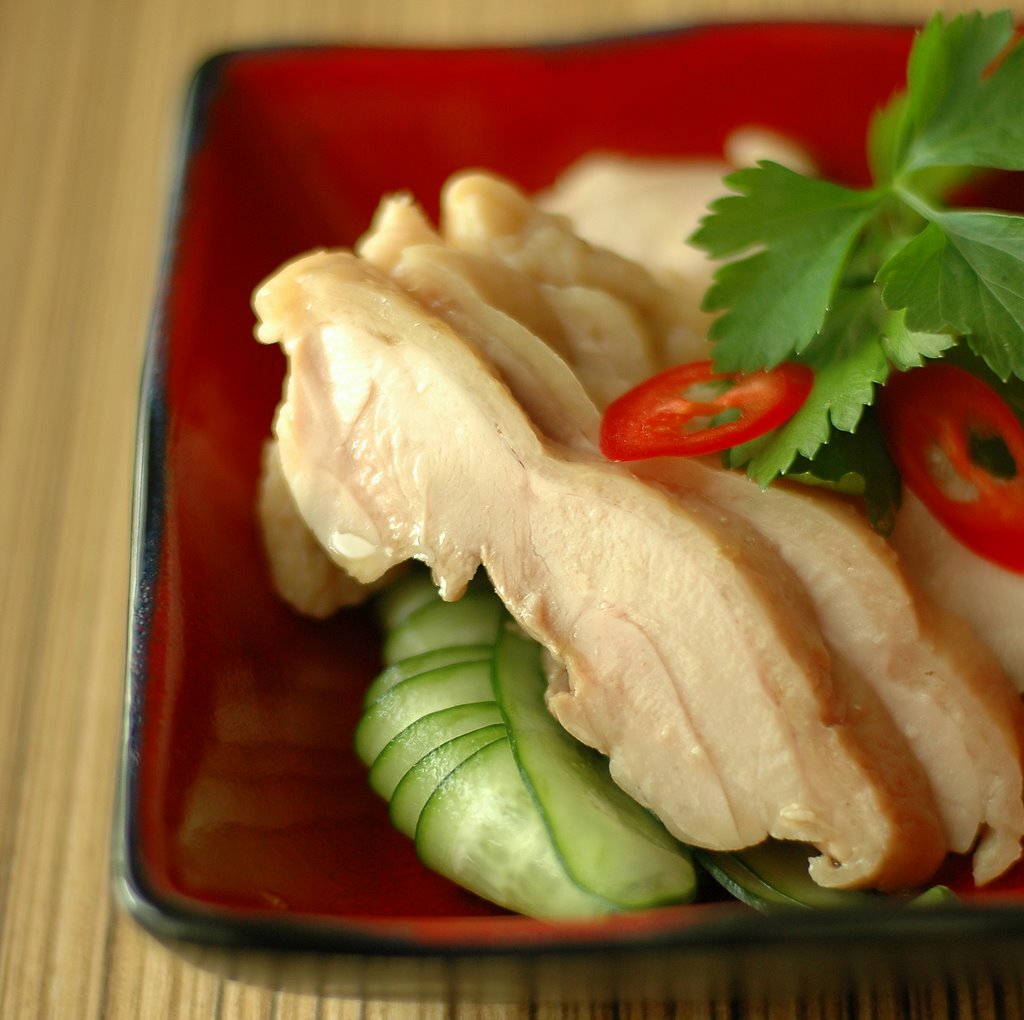 Drunken chicken, jiu ji in Mandarin, describes several distinctly different ways of preparing chicken using alcohol, typically Shao Xing wine. The average recipe calls for just-cooked chicken to be either macerated or steamed in a Shao Xing wine-rich liquid; the former is ideal should you like an upfront alcoholic bite. I don't, so I usually go with the latter method, which lets the gentle perfume of Shao Xing rather than its alcoholic content dominate the flavour.
 The soup chapter of the book was what really blew me away - I saw the homey comforts of dumpling soup (of which quite a few feature in the book), an everyday staple in most Chinese households, in a brand new light.
 In particular, there was a recipe for chicken dumplings in broth that I was intrigued by - as far as I know, the inclusion of lup cheong (dried Chinese pork sausage) in the stuffing is not conventional. It's however a brilliant and inspired addition, playing the same role cured pork or bacon does in farce or forcemeat by adding fat, moisture and deeply savoury soul to meat mince. The generous addition of finely chopped garlic chives (I prefer Japanese nira) lends further nuance and flavour.


